Connect a domain at Namecheap
You have your own domain at Namecheap and want to connect it to your shop? In this article, we have put together a step-by-step guide for you.
On this page
- Top-Level Domain (e.g., shop.com)
- Step 1: Open the DNS Settings
- Step 2: Delete the Parking Page Records
- Step 3: Create a CNAME Record
- Step 4: Create an A Record
- Step 5: Connect Your Shop
- Subdomain (e.g., shop.website.com)
- Step 1: Open the DNS Settings
- Step 2: Create a CNAME Record
- Step 3: Connect Your Shop
- Sources
The setup steps vary depending on your domain type. First, select the domain type you are using. For an overview of all records, see Set up a custom domain for your shop.
Top-Level Domain (e.g., shop.com)
If you want to connect your own top-level domain, follow these steps.
Step 1: Open the DNS Settings
Sign in to Namecheap, select Domain List in the left sidebar and click Manage next to your domain. Then open the Advanced DNS tab at the top. There you find the Host Records section.
Note: The Host Records section is only available if your domain uses Namecheap’s nameservers (BasicDNS, PremiumDNS or FreeDNS). If your domain uses other nameservers, add the records at the provider that manages those nameservers.
Step 2: Delete the Parking Page Records
For new domains, Namecheap creates two records for a parking page: a URL Redirect Record for the host @, and a CNAME Record for the host www that points to parkingpage.namecheap.com. Delete both with the trash bin icon next to the record.
Also delete any other records for the hosts @ and www, for example of type A, AAAA, CNAME or Redirect. Otherwise they would conflict with your new records.
Step 3: Create a CNAME Record
- In the Host Records section, click Add New Record.
- Select CNAME Record as the Type.
- Enter www as the Host and sites.tentary.com as the Value.
- Leave TTL on Automatic and save with the green checkmark.
This connects www.shop.com to your shop.
Step 4: Create an A Record
So that your domain without www also leads to your shop, you add an A record as well.
- Click Add New Record again.
- Select A Record as the Type.
- Enter @ as the Host and 34.179.222.196 as the Value.
- Leave TTL on Automatic and save with the green checkmark.
Step 5: Connect Your Shop
After completing the previous steps at Namecheap, connect your Tentary shop to your domain. Open your shop’s domain settings, select Custom domain, and enter your full domain, including www, in the URL field.
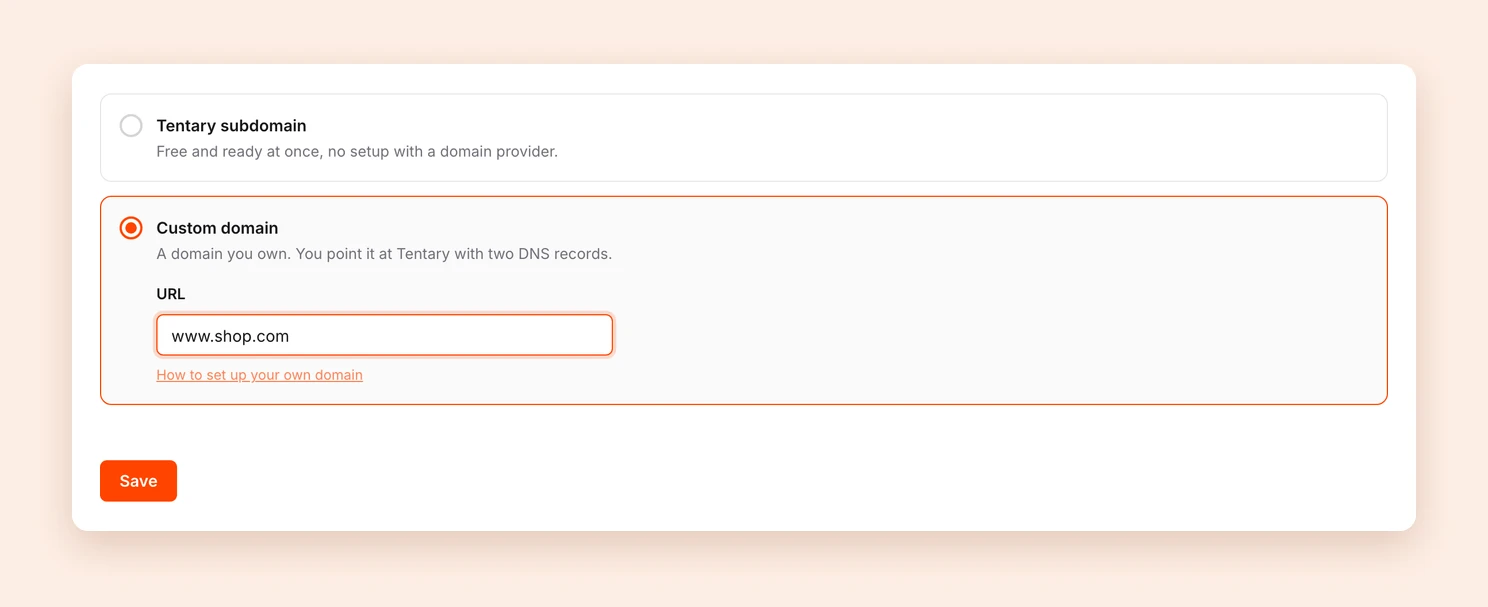
After clicking Save, the status of your domain is shown at the top of the page. According to Namecheap, new records usually take effect after about 30 minutes.
Finally, open your domain without www, for example shop.com. You should land on https://www.shop.com automatically, with the lock icon in the address bar.
Subdomain (e.g., shop.website.com)
If you want to connect your own subdomain, follow these steps. For a subdomain you only need a CNAME record, no A record.
Step 1: Open the DNS Settings
Sign in to Namecheap, select Domain List in the left sidebar and click Manage next to your domain. Then open the Advanced DNS tab at the top.
Step 2: Create a CNAME Record
- In the Host Records section, click Add New Record.
- Select CNAME Record as the Type.
- Enter your subdomain as the Host. For the example
shop.website.com, that would be shop. Enter sites.tentary.com as the Value. - Leave TTL on Automatic and save with the green checkmark.
If there are already other records for this subdomain, delete them with the trash bin icon.
Step 3: Connect Your Shop
After completing the previous steps at Namecheap, connect your Tentary shop to your subdomain. Open your shop’s domain settings, select Custom domain, and enter your subdomain, without www, in the URL field.
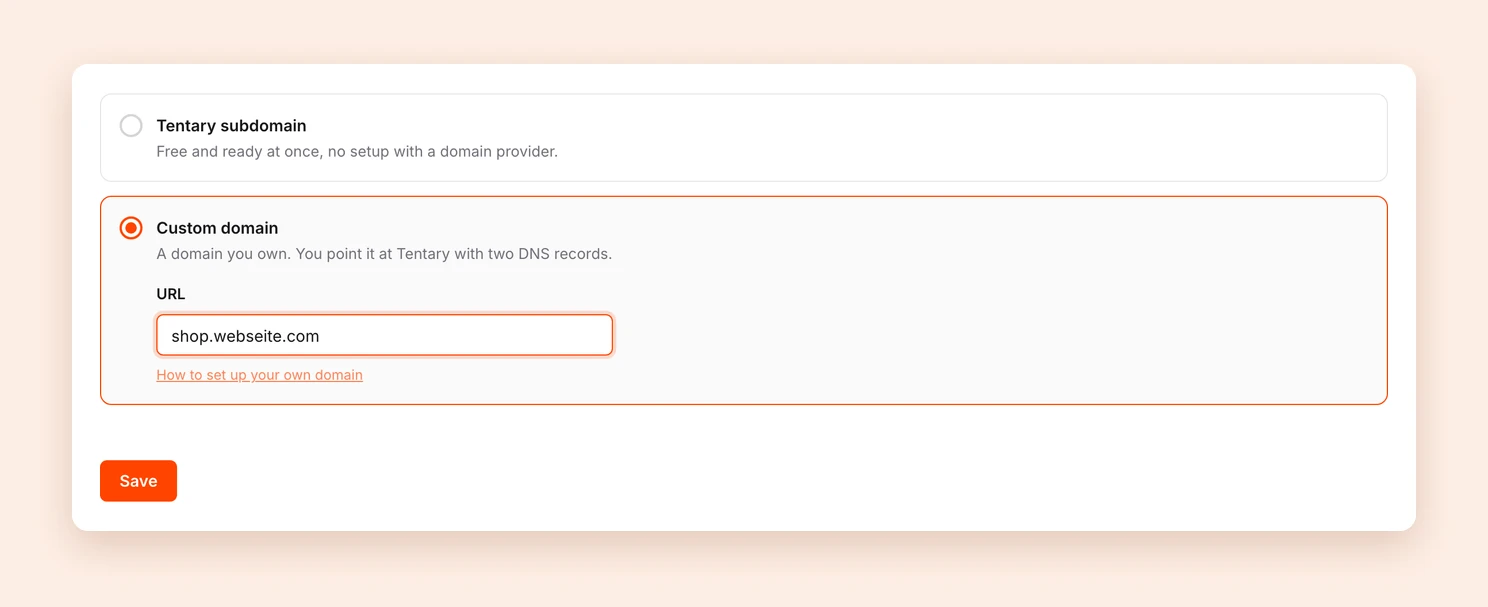
After clicking Save, the status of your subdomain is shown at the top of the page. According to Namecheap, new records usually take effect after about 30 minutes.
Sources
This guide is based on Namecheap’s official guides: How to Connect a Domain to a Server or Hosting and How do I set up host records for a domain?. If the interface looks different for you, you will find the current state there.
Last updated October 2, 2026