Connecting Your Domain with IONOS
Have you purchased a domain from IONOS and want to connect it to your shop? This article provides a step-by-step guide to help you with the process.
On this page
The setup steps vary depending on your domain type. First, select the domain type you are using.
Top-Level Domain (e.g., shop.com)
If you want to connect your own top-level domain, follow these steps:
Step 1: Access Your Domain’s DNS Settings
Log in to your IONOS account and go to the Domains & SSL page. Select your domain, click the three vertical dots under Actions, and choose DNS from the menu.
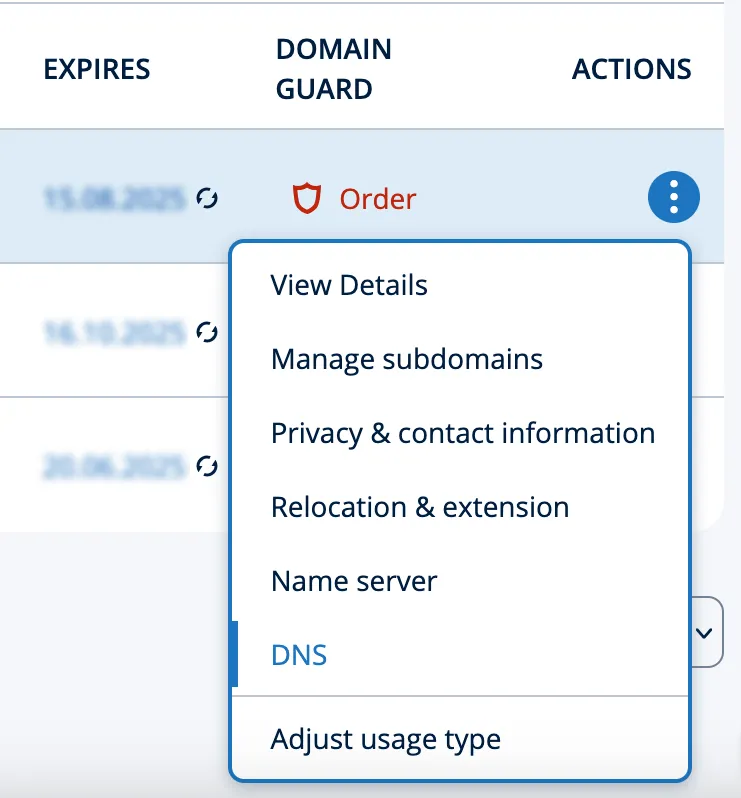
Step 2: Create a CNAME Record
Click on Add Record and select CNAME as type.
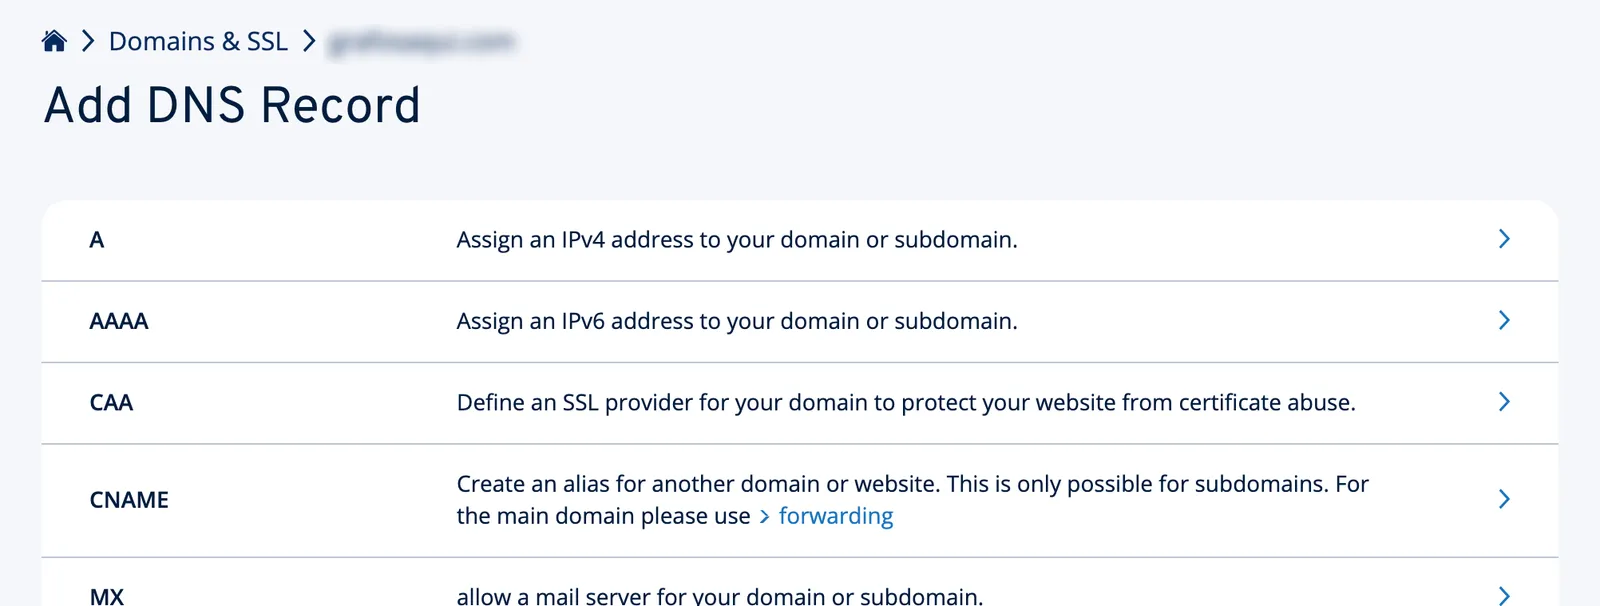
For the Hostname, enter www. For Shows enter sites.tentary.com and click Save.
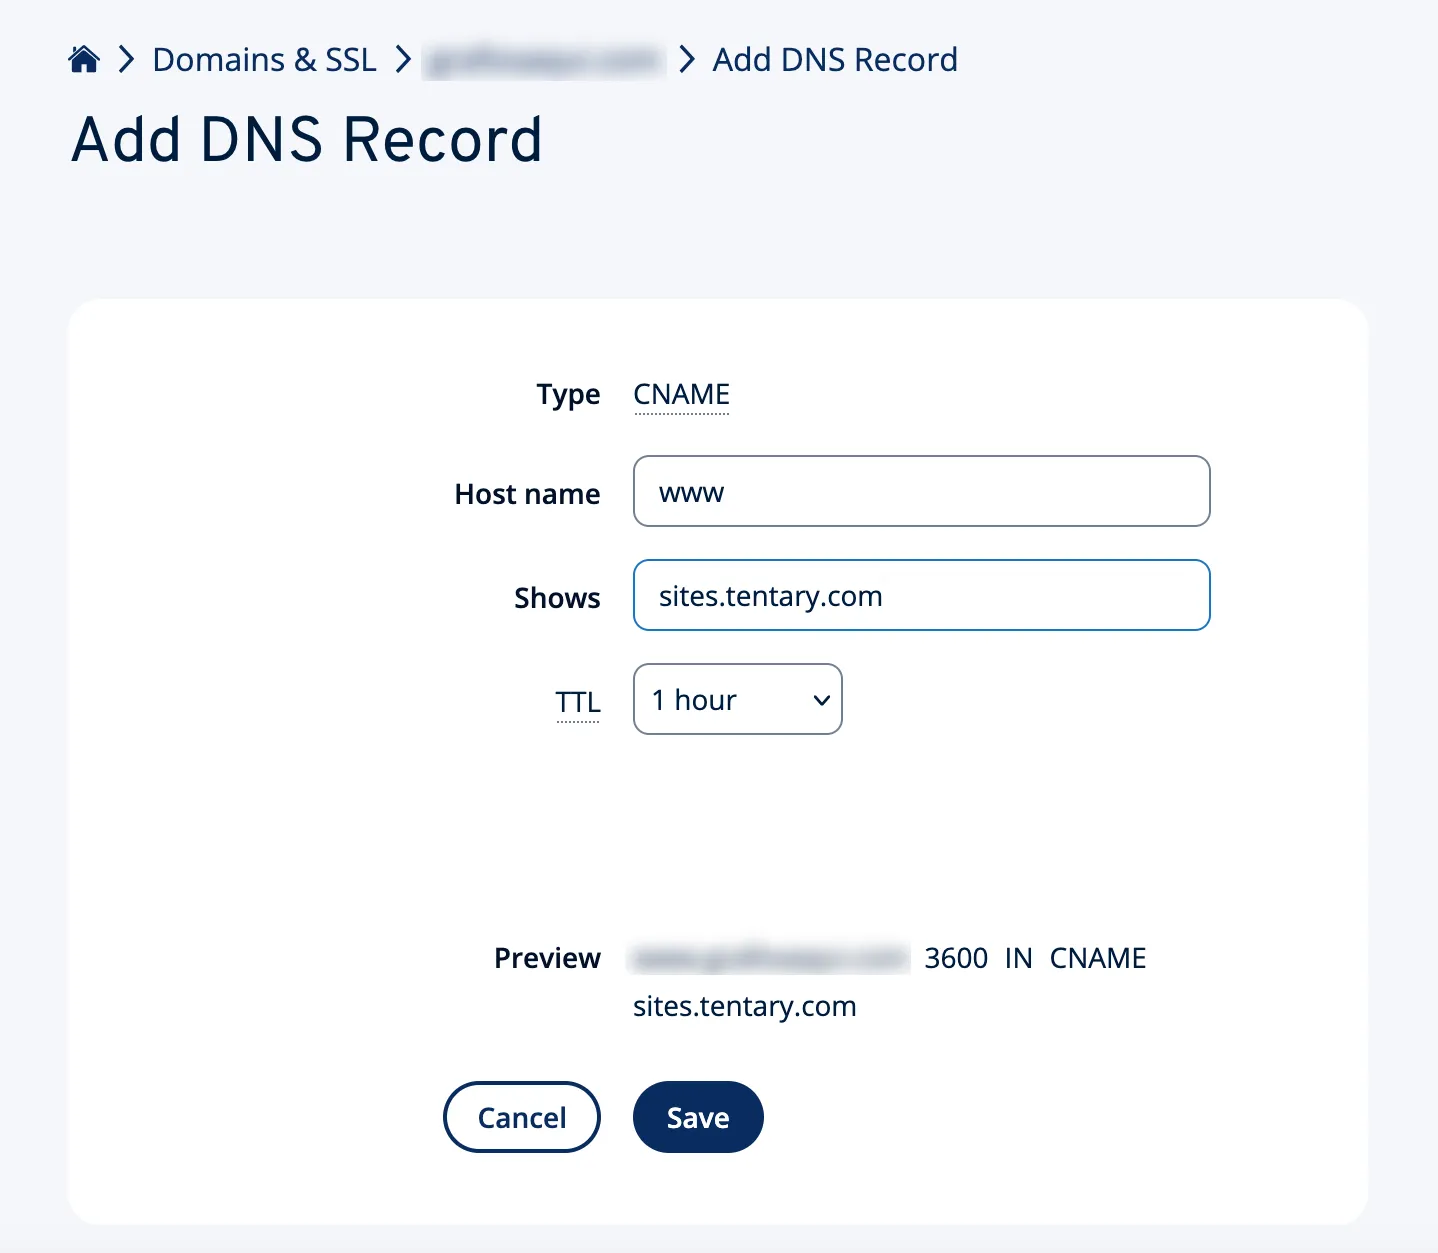
This connects www.shop.com to your shop.
Note: If your domain already has existing records, they might conflict with the new CNAME record. In this case, you will receive a notification. To resolve the conflict, you may need to delete the existing records. As a precaution, take a screenshot of the current records to restore them if needed.
Step 3: Create an A Record
So that your domain without www also leads to your shop, you need an A record as well.
First delete all existing A and AAAA records with the host name @. IONOS often creates such records automatically, for example for a parking page. Then click Add Record and select A as the type. Enter @ as the host name and 34.179.222.196 as the IP address, then click Save.
Note: A leftover AAAA record for @ is the most common reason when your domain without www does not lead to your shop. So check the list of your records once more before you continue.
Step 4: Connect Your Shop
After completing the previous steps in IONOS, connect your Tentary shop to your domain. Open your shop’s domain settings, select Custom domain, and enter your full domain, including www, in the URL field.
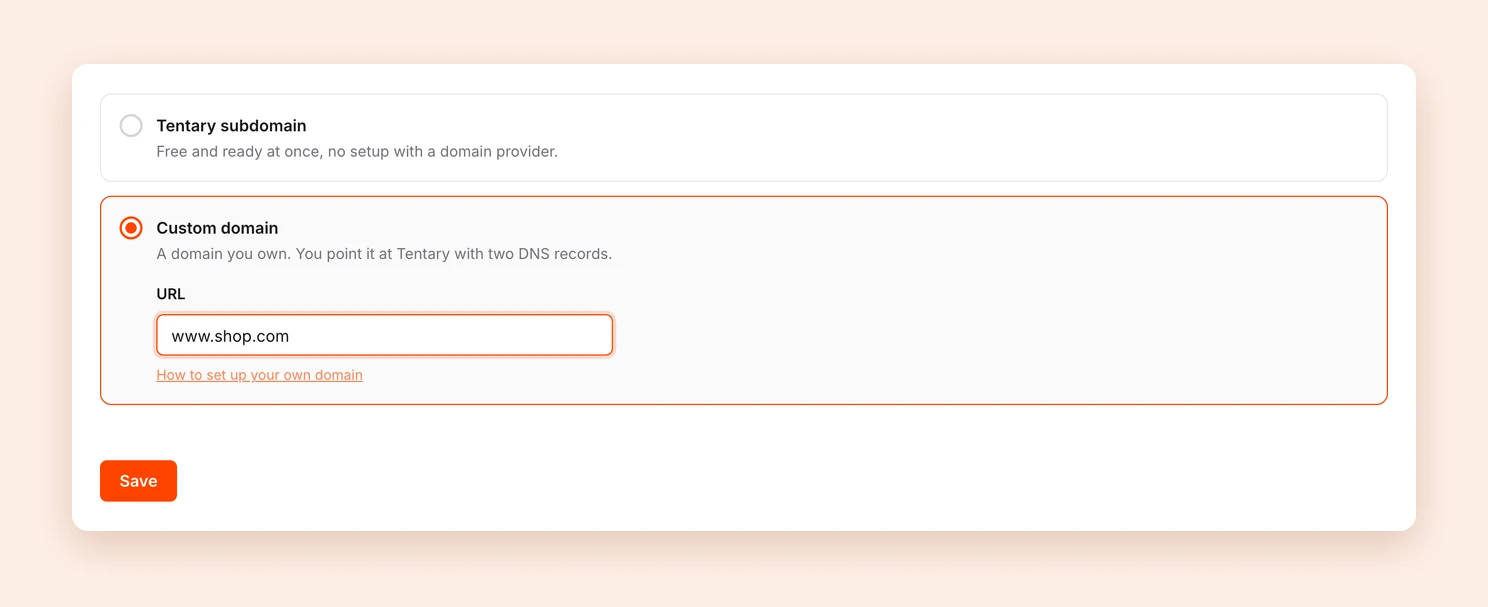
After clicking Save, the status of your domain is shown at the top of the page. Your domain is usually reachable within a few minutes, but DNS changes can also take a few hours.
Finally, open your domain without www, for example shop.com. You should land on https://www.shop.com automatically, with the lock icon in the address bar.
Subdomain (e.g., shop.website.com)
If you want to connect your own subdomain, follow these steps:
Step 1: Access Your Subdomain’s DNS Settings
Log in to your IONOS account and go to the Domains & SSL page. Select your domain, click the three vertical dots under Actions, and choose DNS for this domain.
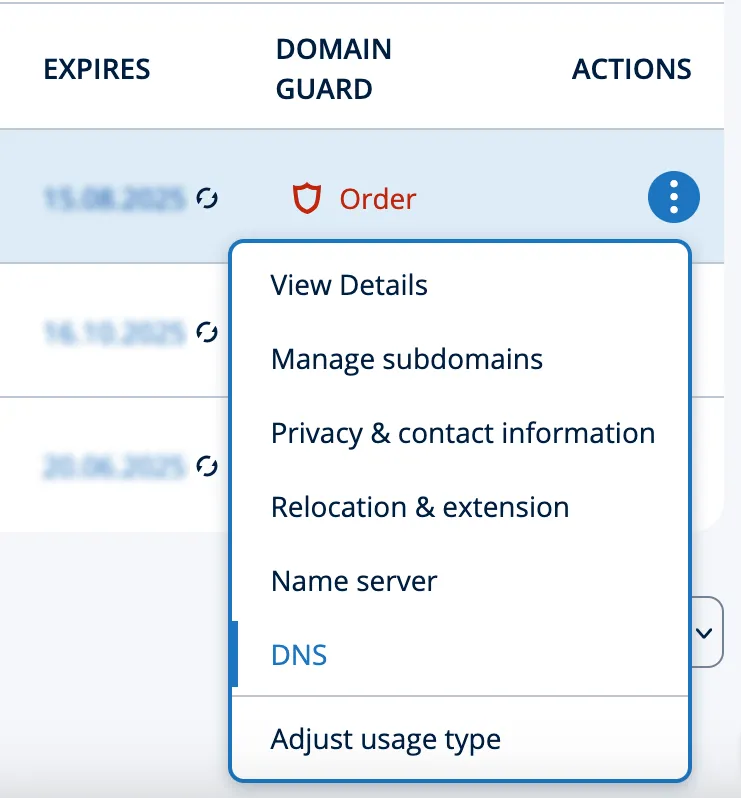
Step 2: Create a CNAME Record
Click on Add Record and select CNAME as the type.
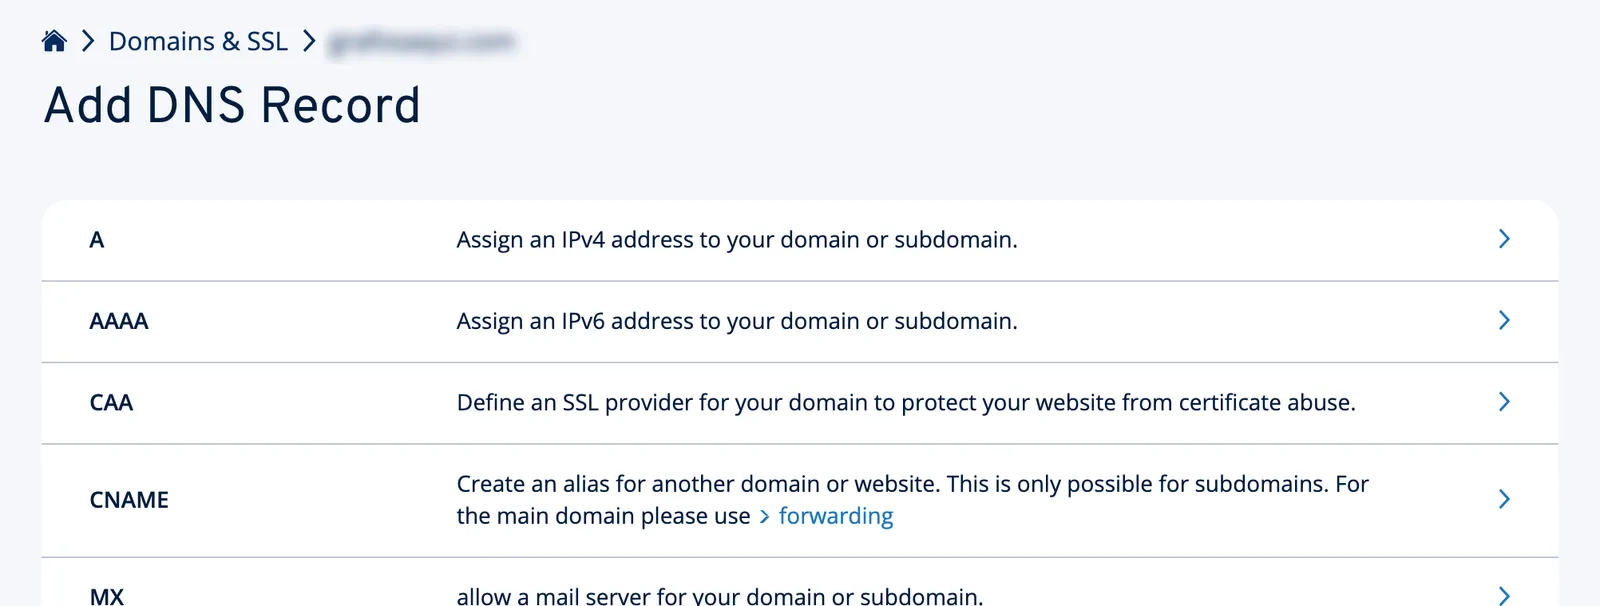
For the Hostname, enter your subdomain. For example, for shop.website.com, the hostname is shop. For Shows, enter sites.tentary.com and click Save.
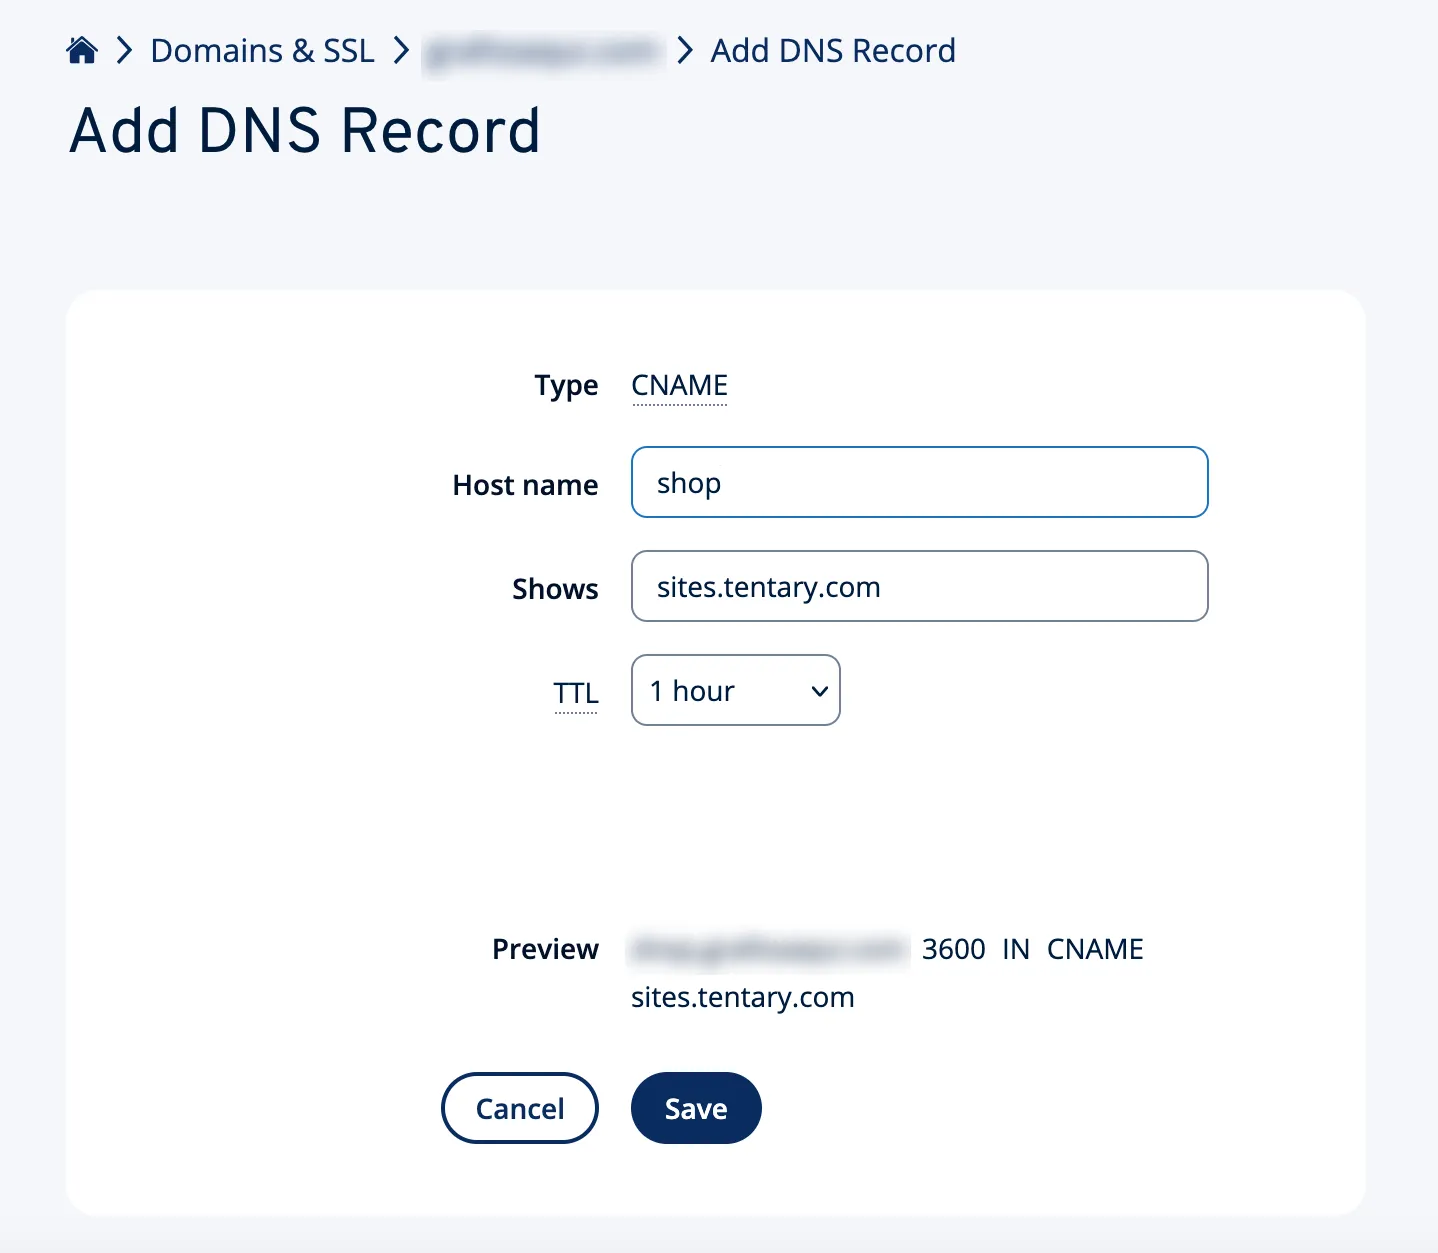
Your domain is now connected to your shop.
Note: If your domain already has existing records, they might conflict with the new CNAME record. In this case, you will receive a notification. To resolve the conflict, you may need to delete the existing records. As a precaution, take a screenshot of the current records to restore them if needed.
Step 3: Connect Your Shop
After completing the previous steps in IONOS, connect your Tentary shop to your subdomain. Open your shop’s domain settings, select Custom domain, and enter your subdomain, without www, in the URL field.
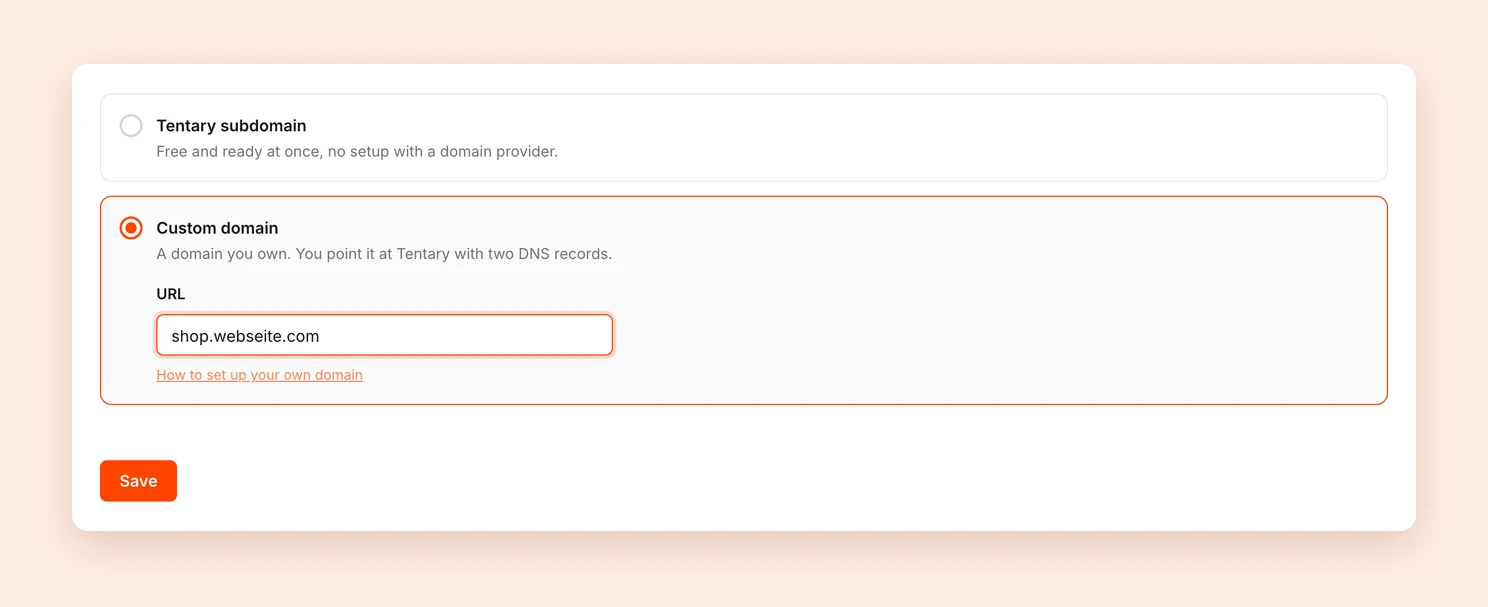
After clicking Save, the status of your subdomain is shown at the top of the page. Your subdomain is usually reachable within a few minutes, but DNS changes can also take a few hours.
Last updated October 2, 2026