Manage appointment bookings
Here you learn where to find your booked appointments and how to set when customers can book with you.
Bookings
Open Bookings in the menu. It lists all upcoming appointments with Date, Time and Details, meaning which product was booked by whom.
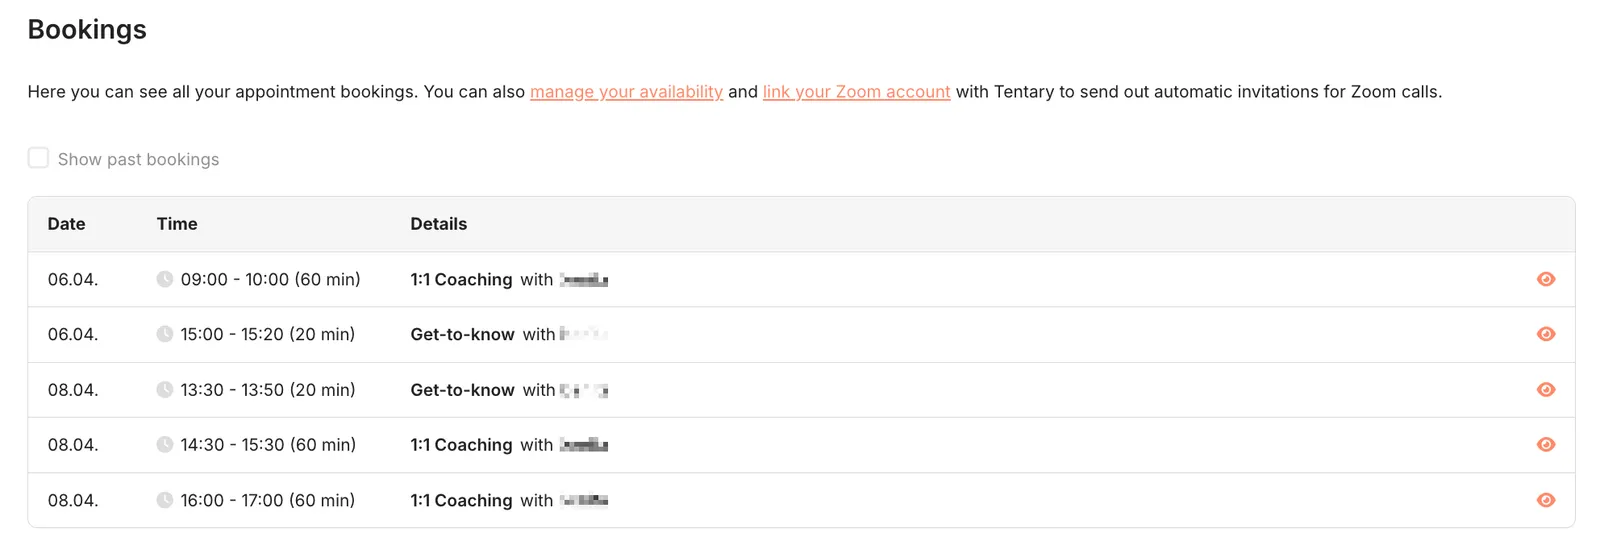
Click a row to open the order for that appointment. Show past bookings also shows appointments that have already taken place.
You also find the appointments of a specific product under Sales. If you select the product there, the Meeting column shows the booked time.
Tip: If a free appointment was booked that will not take place, open the order and click Delete purchase. The slot then becomes free again.
Set your availability
So that customers only book when you have time, you set your availability. Open your Settings and click Availabilities in the Shop area.
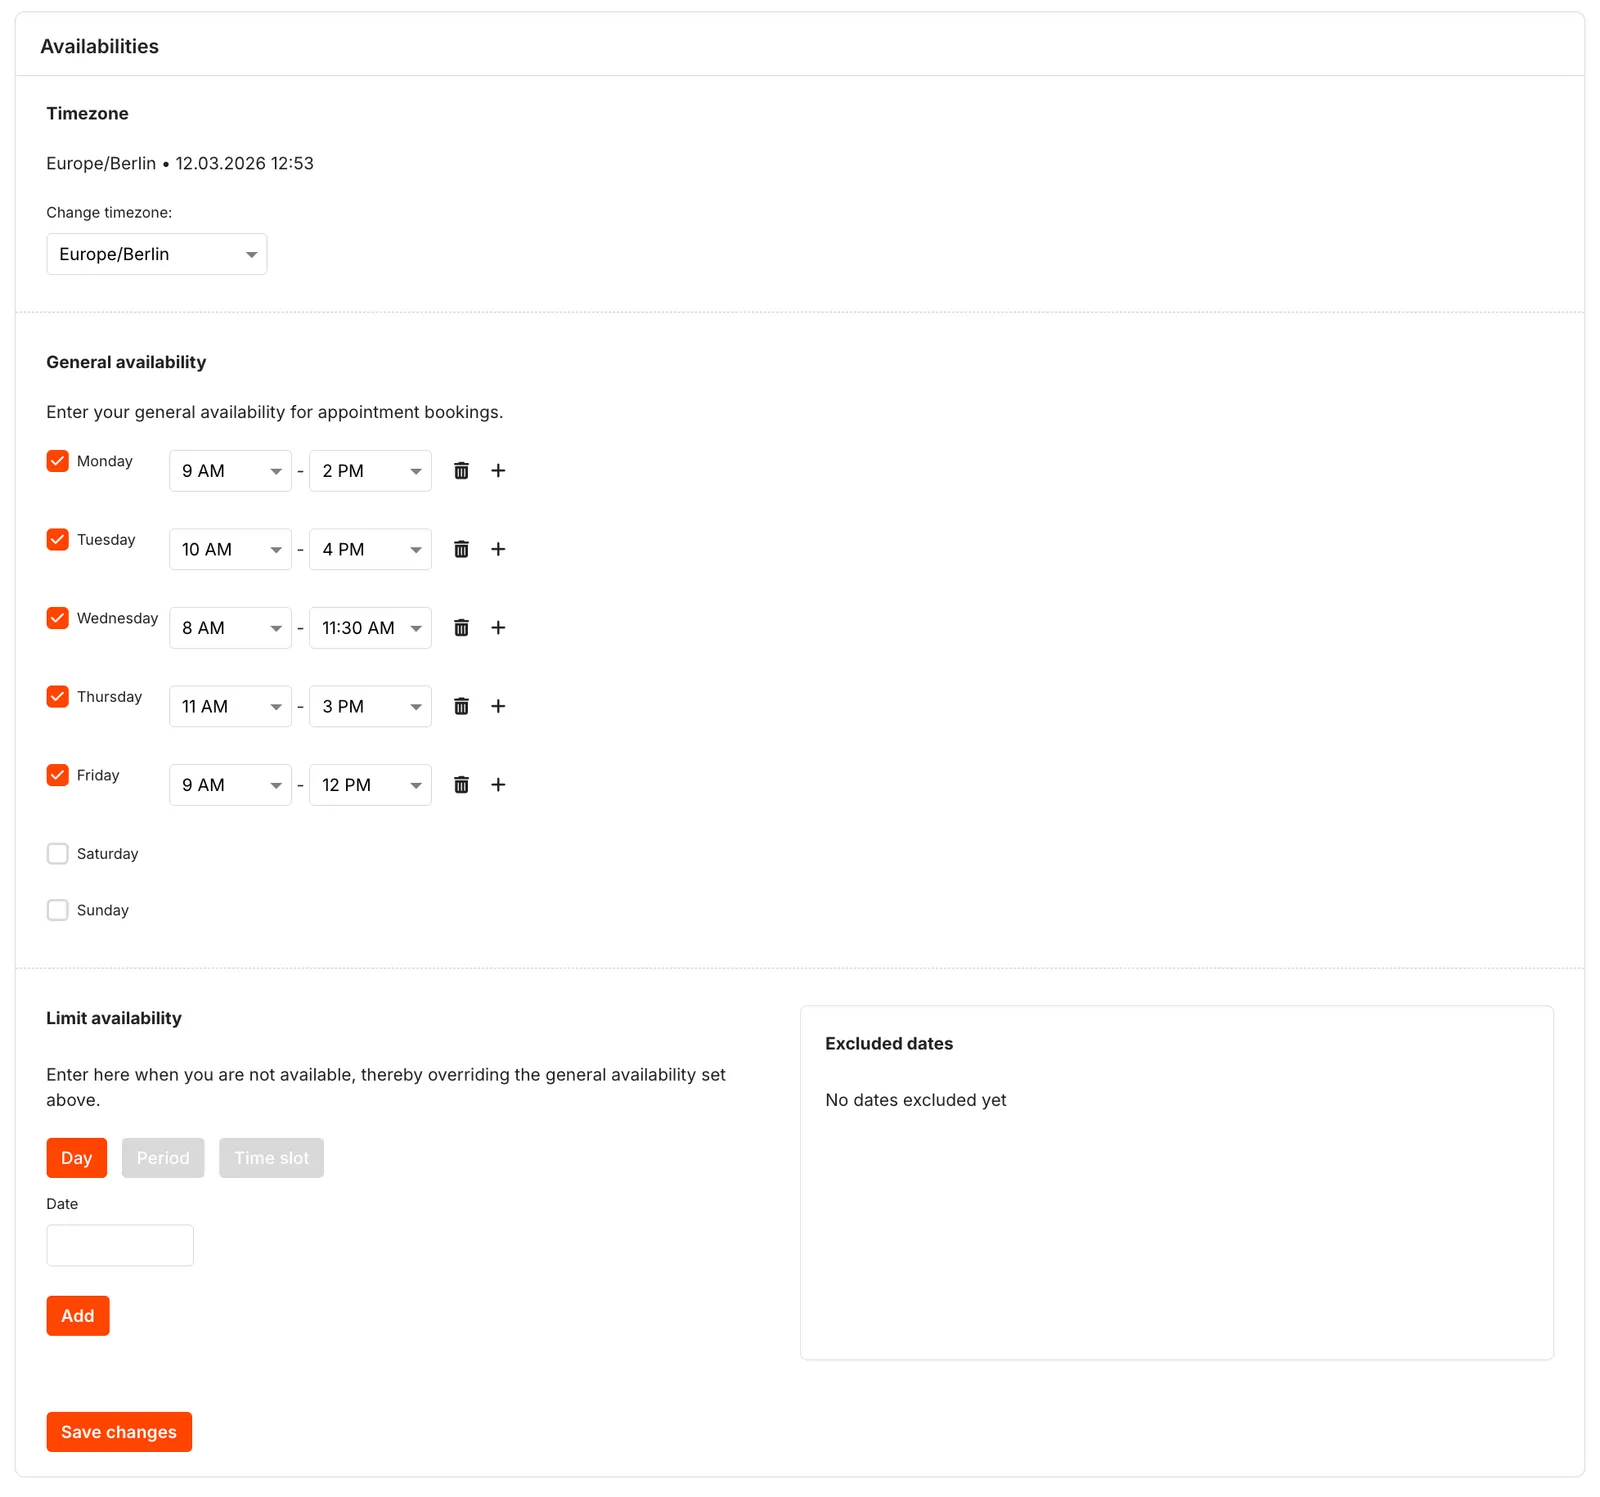
- Under Timezone, check that the time zone matches your location. Under Change timezone you can choose another one.
- Under General availability, tick every weekday on which you offer appointments and choose the times. The plus icon adds another time window to a day, for example for the afternoon after a lunch break.
- Click Save changes.
Limit your availability
If you are away on certain days, for example on holiday, you limit your availability. These entries take priority over your general availability. You have three options:
- Day: a single full day.
- Period: several days in a row. A period can be at most 14 days long. For a longer absence, add several periods one after the other.
- Time slot: only certain hours on one day.
Choose the option, enter the date and, if needed, the time, and click Add. The entry appears right away under Excluded dates and is saved. Use the trash icon to remove it again.
Connect Zoom
If you connect your Zoom account with Tentary, your customers automatically receive an invitation to the Zoom meeting after booking. To learn how, see Zoom integration.
Last updated October 14, 2026